Streamline your iOS builds with Bitbucket Runners
Time is invaluable in our fast-paced world, especially for app developers. Why are you wasting it herding your builds? Below I’ll explain how with a little setup–and a spare Mac Mini–you can avoid build ceremony and focus on adding features to your iOS apps.
TL;DR
By adding a Bitbucket pipelines file to your code repo, and configuring a Mac, all you need to do is push to a branch and minutes later, voila!–the next release candidate is in TestFlight, ready to be pummelled by your beta testers.
Why bother setting up yet another thing?
Whether it’s creating innovative apps, fixing bugs, or simply monitoring production environments, time is crucial. Automating repetitive tasks avoids errors arising from finger trouble and memory lapses, and streamlines the software development workflow, from code to test and out into the wild. Those time savings allow us to get on with building features that add business value. And when the bad thing happens, and a bug makes it into production, a streamlined build helps us get a fix out fast, and avoids the potential for confusion to introduce yet more errors.
There are many tools that we can harness to shorten the development cycle. Here I’ll focus on one very useful resource: Bitbucket Runners. Created by Atlassian, Bitbucket Runners let developers streamline their Bitbucket pipelines, which are a Continuous Integration & Deployment (CI/CD) platform. Runners support multiple platforms out of the box, while also allowing developers to run them on their own infrastructure. This guide will help you set up a Bitbucket self-hosted runner on MacOS infrastructure.
Pipelines and Runners: 10000 foot view
Bitbucket pipelines is a continuous integration and delivery (CI/CD) platform provided by Bitbucket. A Pipeline is a series of steps and commands for creating a build artefact, such as an iOS app archive, or an Android app bundle. These steps are defined in a YAML, named bitbucket-pipelines.yml, which is added to your project repo. This specifies how your code is built, tested, and deployed. This pipeline is triggered automatically whenever changes are pushed to a particular branch defined in the YAML file.
By implementing a pipeline, you can kick off your CI/CD by a simple push or merge to a particular branch on your repo. Pipelines also support the use of tags, schedules and manual triggers to kick off your builds. When setting up your first pipeline, Bitbucket’s documentation has easy to follow instructions for how to set up a basic pipeline that will run on Atlassian infrastructure. But this comes with a few drawbacks: cloud-hosted pipelines have a price tag, and limitations on what you can actually build. For example, currently if you want to set up a pipeline to build and distribute an iOS app, you can’t use a simple Bitbucket pipeline. This is where a self-hosted runner comes into play.
A self-hosted runner allows you to run builds for a pipeline on your own infrastructure without being charged. This also has the advantage of enabling MacOS builds, which allows you to build and distribute iOS apps using pipelines.
Pipelines and Runners: Nitty-gritty
Let’s set up a Bitbucket Runner on your own MacOS infrastructure.
First, some minimum requirements:
OpenJDK 11 (11.0.11 or newer) is installed
Git 2.35.0 and above
A 64-Bit MacOS instance with at least 8GB of RAM as a host for the runner.
Let’s set up your MacOS device. It can be any device running MacOS, but let’s assume you’re using a new Mac mini or Mac Pro.
Boot the machine with a mouse, keyboard and monitor attached, and run through the initial set up steps.
For security, set your password to be required immediately after the device goes into sleep mode.
Set energy saver to turn off display after 10 mins, prevent sleeping automatically, and start automatically after power failure.
In sharing options, set your computer name, allow screen sharing, remote login and turn off AirPlay.
Set software updates to automatic.
Set up your CI account like you normally would when setting up a new account on a Mac.
Screen Sharing and Remote
The next step will be to set up remote login on your Mac. Open up System Settings -> General -> Sharing
Turn on Screen Sharing and also remote login.

You can allow full disk access for remote users and also select which users you want to allow access to remote login. You can set it so that only the user we initially created has access. If you have other profiles set up you can deny them access, as we only need our newly created profile to be our runner.
Let’s test that the remote login is working. Open up your terminal and type:
ssh username@hostname
The username is the name of the profile we’ve created and the hostname the name of the computer. This can be found by opening the terminal and checking the name after the @.
At this point you can set up your Mac with all the tools you’ll need. Here is a list of applications and tools that you may need in order to build your app from Bitbucket pipelines.
Homebrew
Ruby
Node
Java
Python
Xcode
Docker
AWS CLI
Runner Set Up
With all that done, we’re ready to set up our Bitbucket Runner.
The runner will start each job using a bash login environment that loads .bashrc and .bash_profile. We will modify this so that the environment works as needed. Update .bashrc to the below:
Run the following curl command to update ssh/known_hosts
Your known_hosts file should now contain the line:
bitbucket.org ssh-rsa ‘ABCDExxxxxxxx…’
Create and configure your bitbucket-pipelines.yml and add this to your project repo.
Now we can add our runner. Go to Bitbucket, and navigate to the runners page.

For this example we’ll set up a Repo runner: go to your chosen repository and open up settings and scroll down to the Pipelines section, select Runners, and there you’ll be able to add a runner. Move to the next step and follow the provided commands to download the .tar.gz package.
Extract the file to ~/atlassian-bitbucket-pipelines-runner
cd into ~/atlassian-bitbucket-pipelines-runner/bin
Run the command ./start.sh … with accountUUID, runnerUUID, and clientSecret from the command provided.
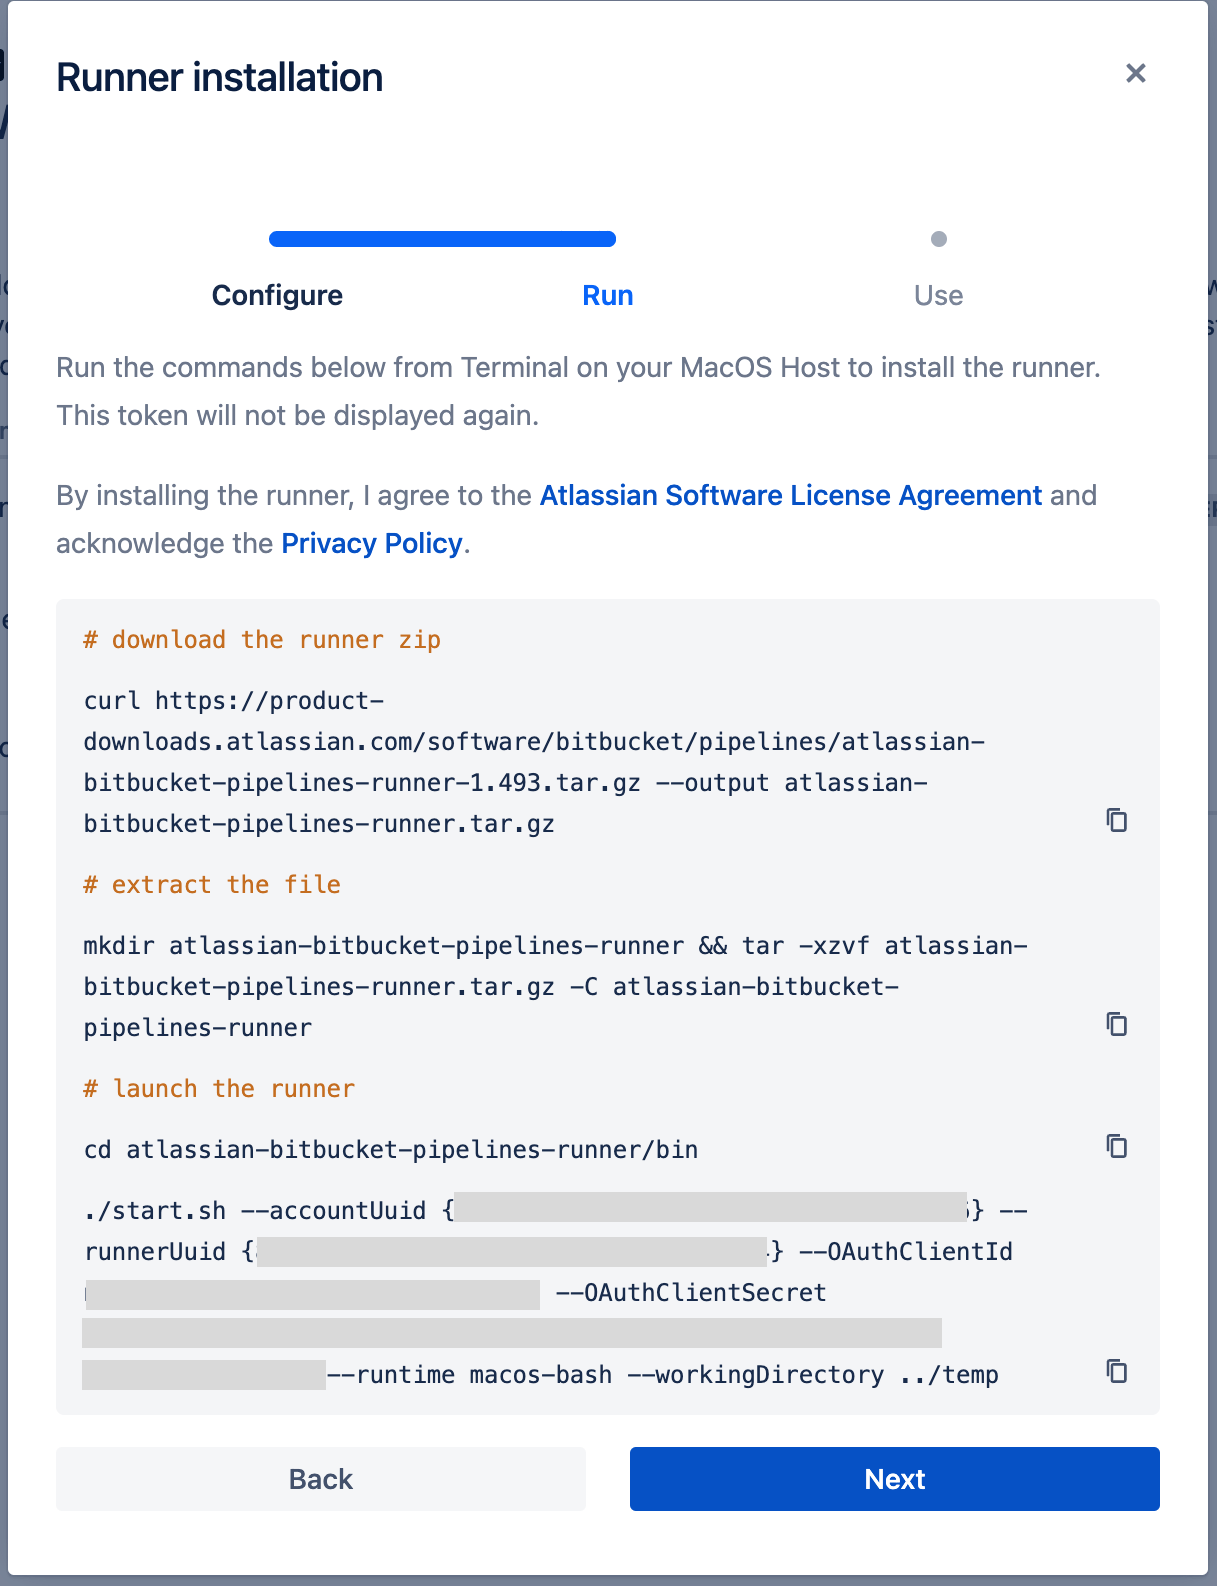
*Keep this final command as you’ll need it for the launch agent.
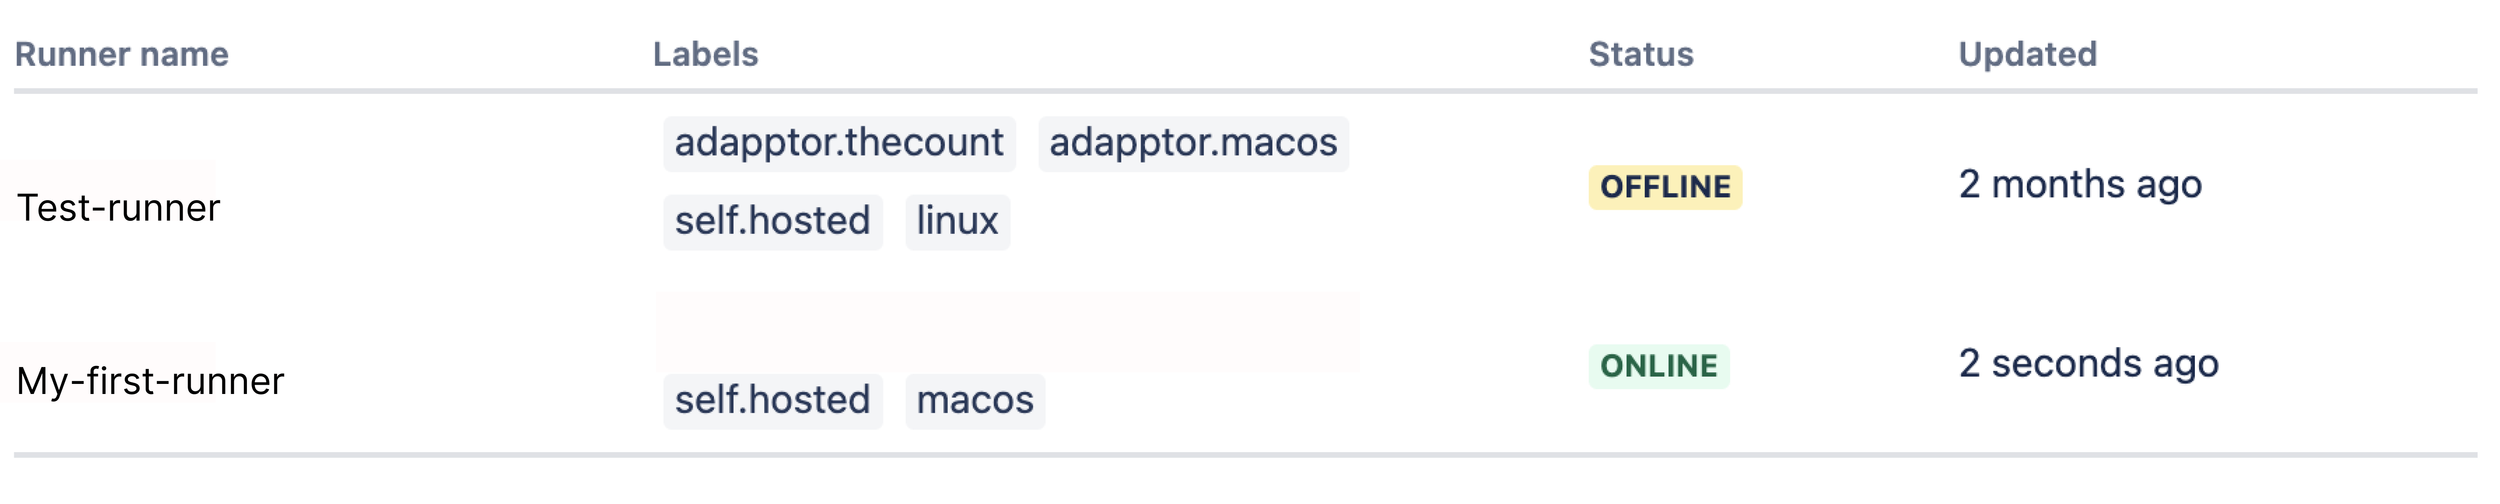
Verify that everything is correct by checking that it is listed as online on the repo runners page, and by initiating a build that uses this runner. CTRL-C to stop the agent.
The final step is to create a .plist file that will launch our runner agent.
First create a new file in your directory ~/Library/LaunchAgents/ called bitbucket-pipelines-runner.plist. Add the following to your plist and remember to replace <string>./start.sh …</string> with the command that we kept from above and was provided above to start your runner.
Remember to update USERNAME to your account name. >/Users/USERNAME/atlassian-bitbucket-pipelines-runner/bin
Load and start the agent: launchctl load
~/Library/LaunchAgents/bitbucket-pipelines-runner.plist
Now you must login to your machine again to make sure that the agent works. Finally login to Bitbucket and check that the runner is now online in the repo runner workspace.
And that’s it! You’ve configured your first fully automatic, self-hosted Bitbucket build pipeline for iOS. Welcome to the world of predictable, efficient builds 🎉. Now that you have a taste for what CI/CD tools like Bitbucket Runners can do, you might want to explore how you can configure your pipelines to lint, test, and even deploy to production–all in the name of focussing dev time where it matters: on adding features that your users will love.